The temperature units on a logger's display are set during configuration with LogTag Analyzer. It can be changed as many times as you need, however, it can only be changed at the time you configure the logger. It is not possible to change the units during or after recording without losing the data just recorded.
USB Loggers (USRIC-16, UTRID-16, UTRED30-16 ETC...)
The temperature units are set in the File Settings tab during configuration:
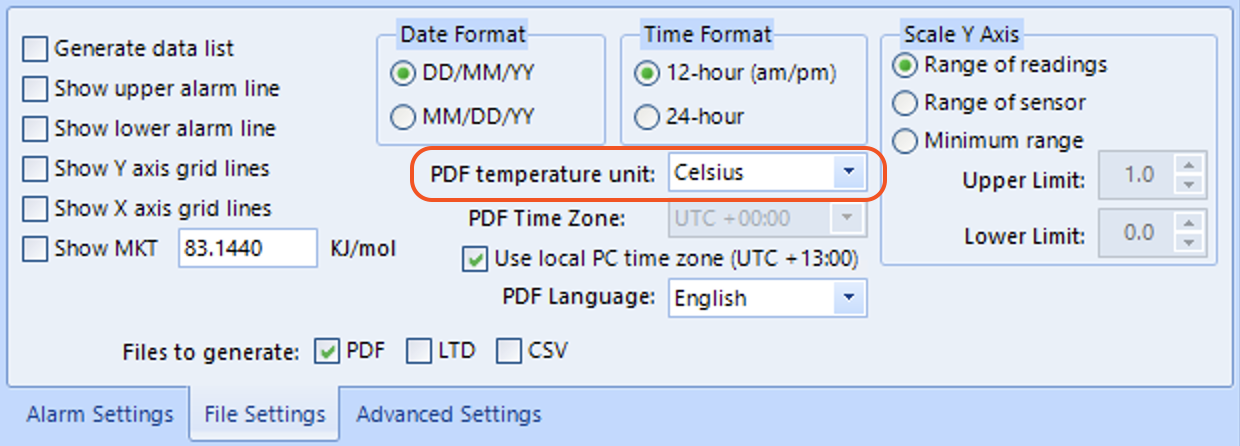
Here, you don't only set the temperature units for the PDF, but also for the display, if the logger has one. Temperature units for the display and the PDF cannot be different.
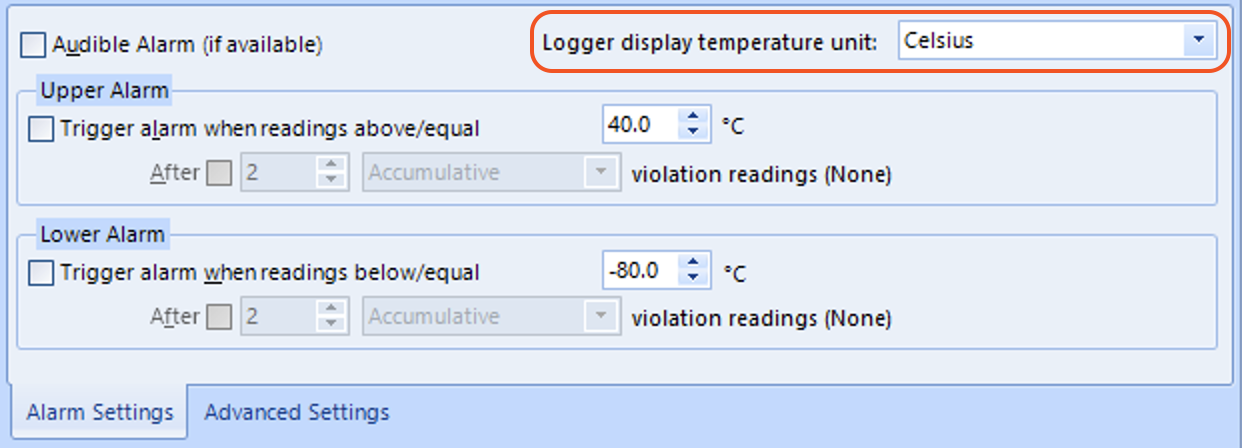
Non-USB Loggers with display (TRED30-16R, TRID-30-7 etc...)
For loggers with a display, but without USB and PDF generation, the temperature units are set in the Alarm Settings tab during configuration:
Note: This does not change the temperature unit used on the PC's screen for reports and charts.
See here how to change the temperature unit for that.
To see an overall preview of our LogTag products, we have resources available below to help you make comparisons and differences between each of the product features side-by-side, as well as the application type(s) each logger is suited for:
Click the links below to download:
LogTag® products support a feature called pre-start logging, which can be selected during configuration.
When pre-start logging is enabled, the logger will automatically start recording as soon as configuration is completed. It will record at the sampling interval defined during configuration and will continue to record until the user starts the logger by pressing the START button. Once the logger has been started, it will record started readings. While the logger is recording pre-start readings the Alert LED will not activate, even if an alert condition is present, no PDF is produced for USB PDF loggers when plugging into USB and when downloaded to LogTag Analyzer, the report tab will not be available.
Pre-start logging is useful as a fail-safe recording setting so if the logger is not started at the appropriate time, the readings will still be available to view later, albeit without the alerting functionality.
When the readings are retrieved from the logger, any pre-start readings will be separately displayed, so the user can quickly identify the readings recorded before and after the logger was started.
All LogTag® products have a finite amount of memory to store the readings they records. Therefore, while the logger is recording pre-start readings the LogTag® will operate in continuous operation. In this mode, the oldest pre-start reading will be overwritten with the latest pre-start reading once the logger's memory is full, or the latest started reading if the logger has been started.
Once started, the logger will first fill any remaining memory, then overwrite the oldest pre-start readings until the complete memory is filled with started readings.
If a logger was configured to start recording at a certain date/time, or for push button start from hibernation, no pre-start readings will be recorded. If you configure a logger with a start delay and have pre-start logging enabled, pre-start readings will also be recorded during the start delay.
Logging cannot be manually stopped on the Logger itself. If you want a Logger to stop recording at a specific time, select a specific number of readings or select a specific time period to be covered in the “configure for next use" screen.
The Logger will then stop recording data when that point is reached. If you choose “Record Readings Continuously", the oldest recording will be overwritten once the memory of the Logger is full, and the Logger can only be stopped by re-configuring or hibernating it with the LogTag Analyzer Software. An exception to this are TRID30-7 and TRED30-7 loggers, which can be stopped with the Start/Stop/Clear button, but this feature must be enabled when the loggers are configured.
Tip: Use the “Inspection Mark" feature to indicate when a load has safely reached its destination. When the “Start-Mark" button is pressed while logging is in progress, an inspection mark is inserted in the recorded data. This enables confirmation that the load has been manually checked at certain times in the journey, and also enables the recipient of the shipment to show when the load arrived at its destination.
The model number of your LogTag logger is printed on the model label on the rear of the logger.
You can find the serial number for your logger in one of two places:
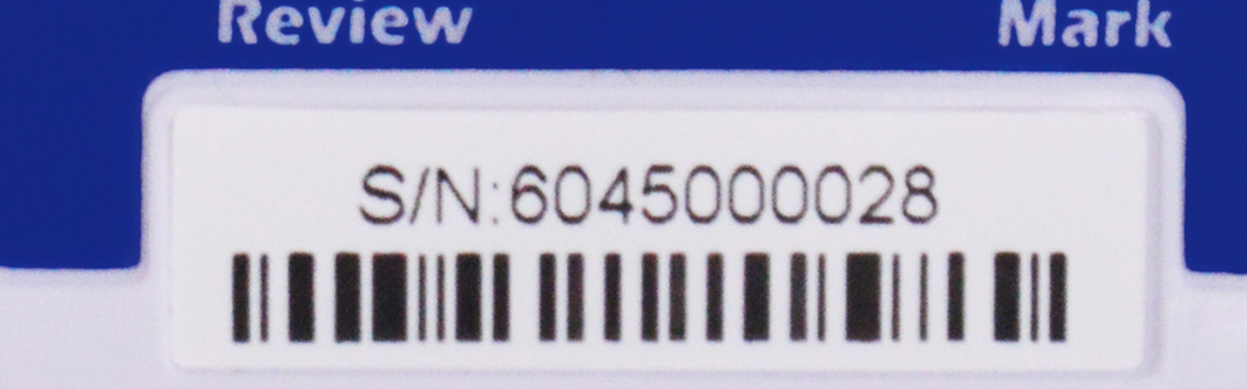
On the front of the logger, above the barcode
USB loggers feature a special recess at the front which contains the barcode/serial number label.
On the model label on the rear of the logger
Loggers with a traditional 3-pin interface contain the serial number on the model label on the rear of the product.
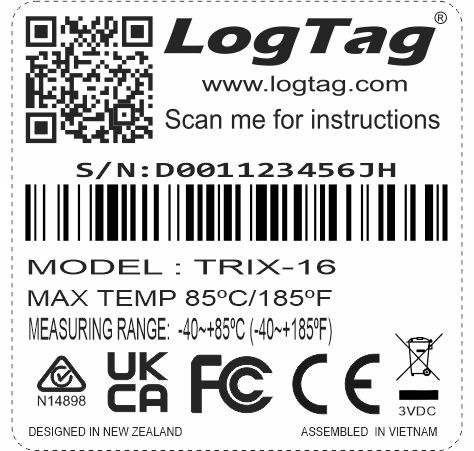
The serial number is preceded by the letters "S/N:".
You can find more about the composition of serial numbers here.
When sending diagnostics, please send both the model and serial number. With this information it is faster for us to find the information about your Logger.
In order to download readings, first open LogTag Analyzer and then connect your Logger with your computer via interface cradle or via USB, depending on which type of Logger you have.
After a few seconds, the downloaded data will appear. You can turn off automatic download by clicking on “Auto-download is ON” at the top right of your screen. Data can be displayed in Chart-, Data-, Summary- or Day Summary formats by clicking the tabs at the bottom of the chart dialog. Data can also be saved in a number of formats including TXT, PDF, HTML and CSV for import.
All loggers with a display indicate whether they are recording, or have finished.
Applies to following models:
TRID30-7R, TRID30-7F, TRED30-7R, TRED30-7F, TRED30-16R
UTRED30-16, UTREL30-16, UTRED30-WiFi, UTREL30-WiFi
UTRID-16, USRID-16, UTRED-16, UTREL-16
UHADO-16
Typically, the logger's display shows REC if it is recording.
It shows STOPPED
If the logger is a multi-use model, you can get it to log again with the following procedures:
For both procedures, please refer to the respective user guides for your model, which you can access from the Products page of our website or the documentation section here.
The batteries used in Loggers are Lithium-metal button cells of 3V rating. They are classified under the IATA Dangerous Goods Regulations as lithium metal batteries contained in equipment.
The batteries have been tested and comply with the IATA requirements for safe transport by air when contained in equipment and packed according to the relevant standard. Our products do not affect aircraft and have passed all necessary electromagnetic emissions tests prior to going into manufacture.
Material Safety Data Sheets (MSDS) can be provided on request.
For a push-button start (with the TRID/TRED/TREL models) use the following procedure:
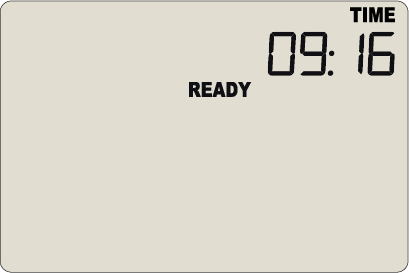
The recorder must be in "READY" mode for it to be started. The current time and the "READY" symbol are shown. If the displays shows "NOT RDY", your logger has been hibernated.

Press and hold the "START" button. First, "STARTING" is showing in addition to "READY".
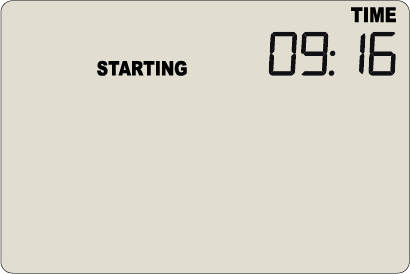
Then "READY" disappears.
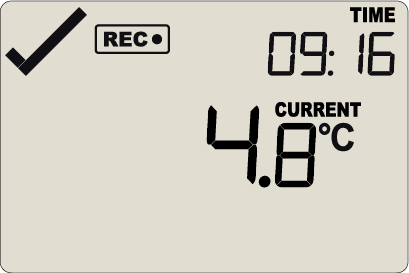
Once "READY" disappears, release the button within 2 seconds. "STARTING" will also disappear, and the "REC" symbol will be shown. The Logger now records temperature data.
Note: The Logger will not start if you release the button before "READY" disappears or when you keep holding the button for more than 2 seconds after "READY" disappears.
If you have one of the other models not mentioned in step 2, this procedure won’t work. Please check your user guide for more information.
Each LogTag data logger can be identified via a unique serial number. This number allows LogTag to identify production information, as well as giving you, the client, the ability to create records that are unique to each logger.
Over the years we have introduced several different formats of serial numbers. These numbers can be found on the front or rear of the loggers, typically together with a Code-128 barcode that represents this serial number, preceded by "S/N:".
10-DIGIT NUMBERS
10-digit serial numbers are typically used for our older 3-pin models such as TRIX-8 and SRIC-4. They consist solely of digits and are typically found as part of the model label on the rear of the product.
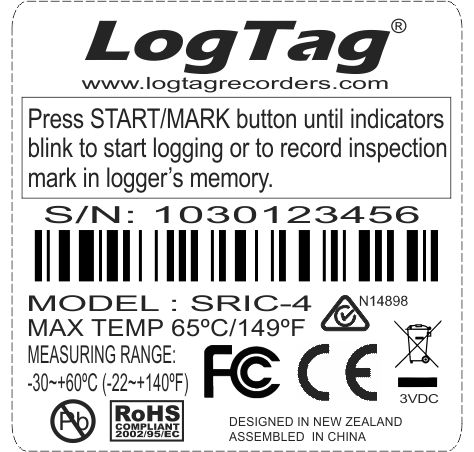
The serial number contains limited information about the model and an index number.
12-CHARACTER SERIAL NUMBERS
12-character serial numbers were introduced to allow better integration of the loggers with LogTag Online, as an included verification code prevents loggers to be incorrectly registered.

They were used particularly with our WiFi model, but have now transitioned to most loggers. The serial number has 3 distinctive sections.
4-character identification code
This consists of alpha-numeric characters and contains information about the model.
6-digit index number
2-character verification code
These two alpha-numeric characters represent a checksum and are required for LogTag Online to verify the preceding 10 characters have been entered correctly.
The actual serial number is still only a 10-character number; in fact, the logger electronically only stores the 10 characters and calculates the verification code when needed.
To make this more obvious, we will successively introduce a slight variation of this label that clearly identifies the verification code.
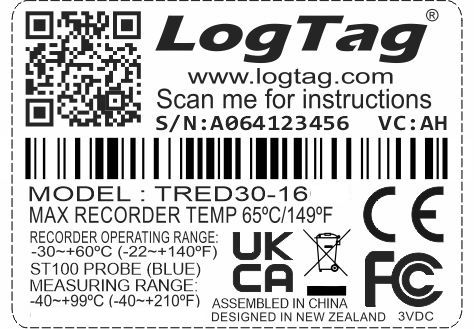
Note that the verification code is always present in the barcode.
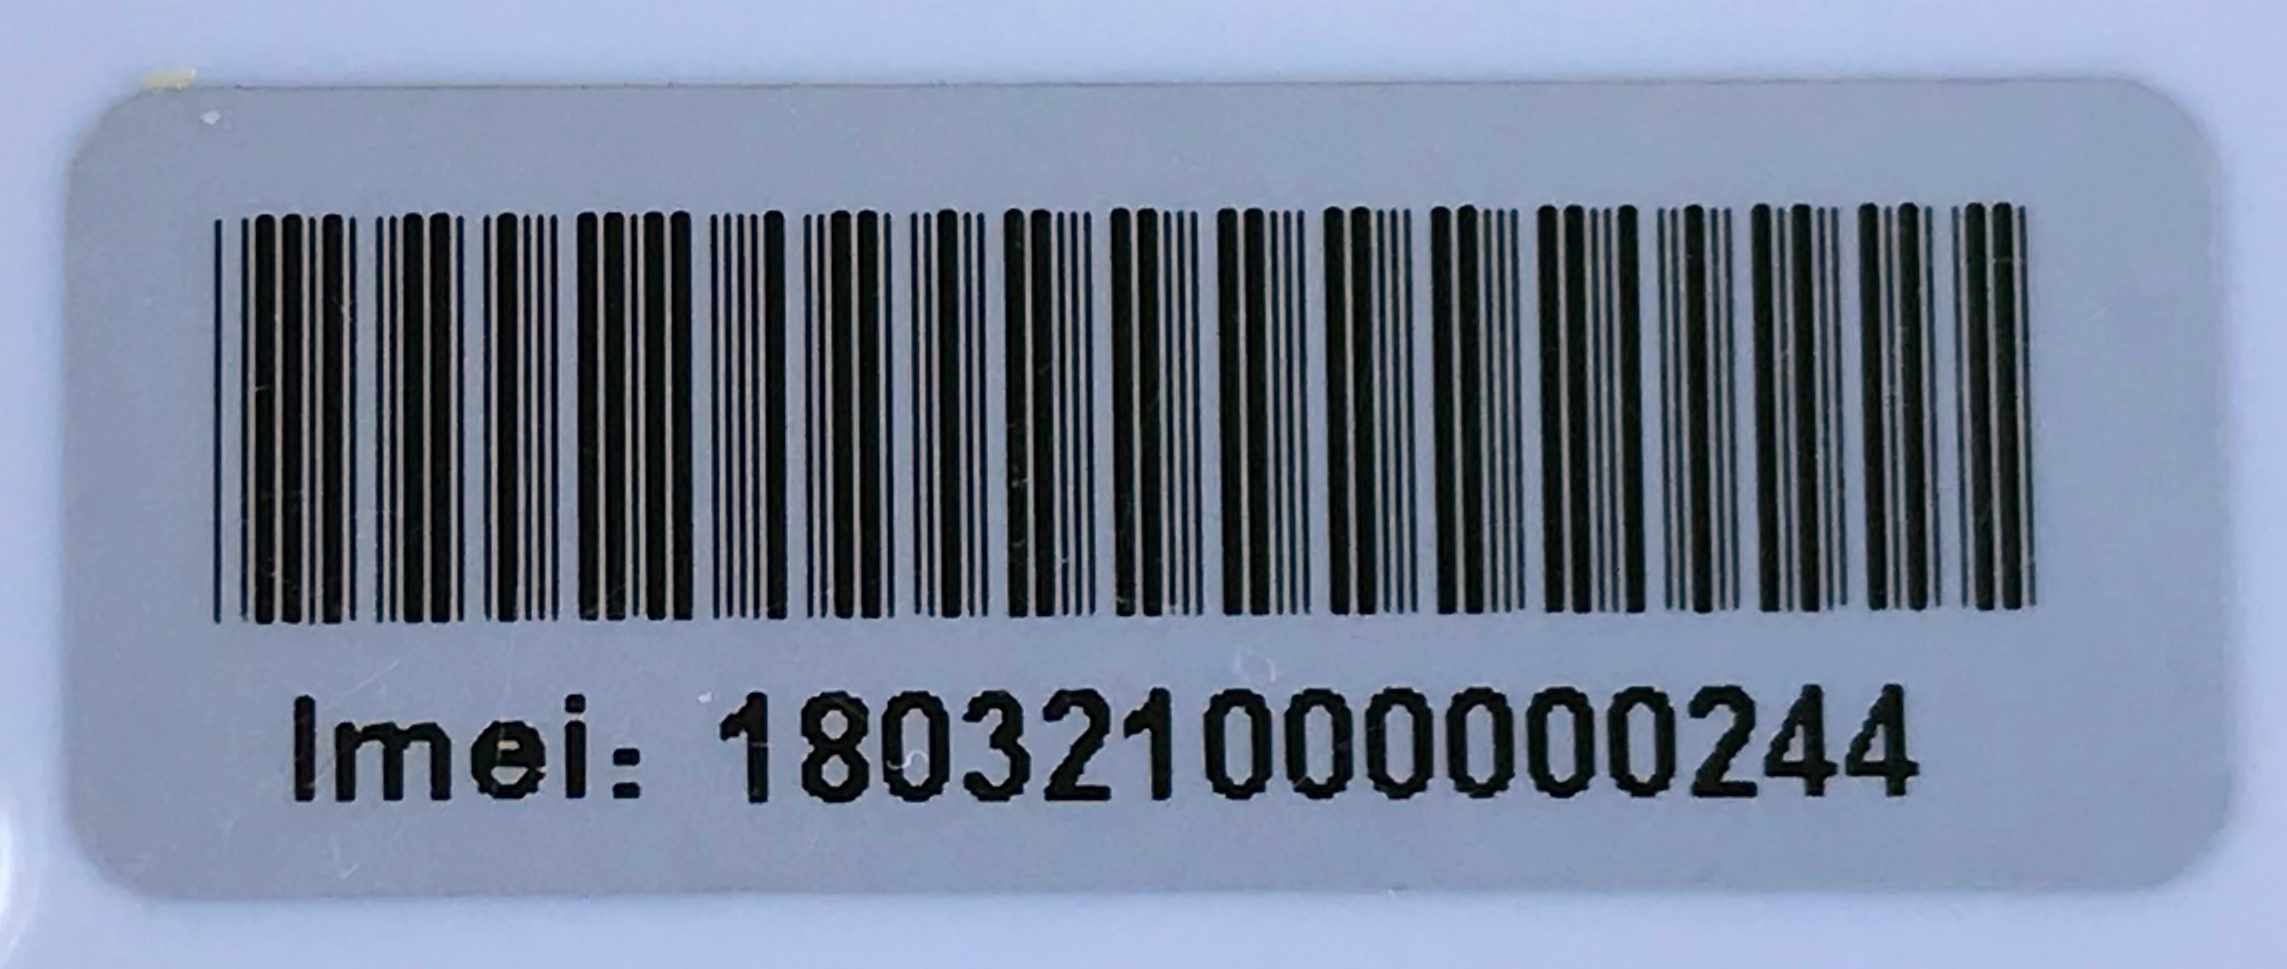
15-DIGIT SERIAL NUMBERS
15 digit serial numbers are used on the EV4-GEO exclusively, and represent the device's IMEI (International Mobile Equipment Identity) number.
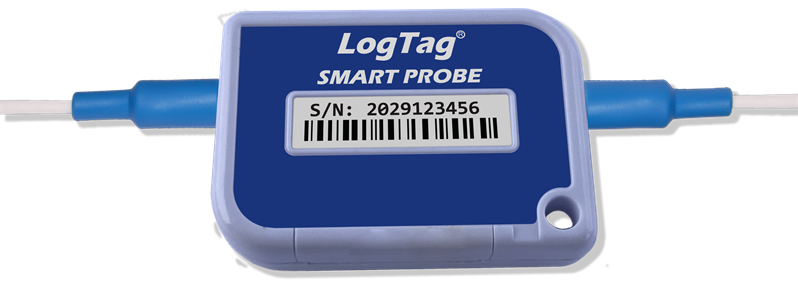
Smart Probes are a new type of external probe developed by LogTag®.
Each Smart Probe contains its own electronics for measuring temperature. Calibrated temperature data are then transmitted to the logger to which the probe is connected. The logger acts only as a display and storage device. This means, the Smart Probe can be calibrated independent of the logger it is used with, and the logger itself requires no additional calibration.
You recognize the Smart Probe by its small case that holds the electronics conditioning and communication circuit:
The latest dual-channel loggers UTRED30-16 and UTRED30-WiFi are compatible with this probe, and also have hot-swap capability:
The logger will display warning messages if the battery of the Smart Probe is low and requires replacement. This will be done by our distributor network at the same time a calibration is performed.
If you use an analogue probe, the logger's internal calibration is used. Smart Probes do not use the logger's calibration, instead, they each use their own calibration data.
For more information, please refer to the LogTag Analyzer User guide and the respective product manuals, available from the LogTag® Website.