| Signal | Sequence | Occurrence |
| Wake-up signal | 4 alternate flashes of green/red LED’s | Displayed after configuration has been successfully applied to the Logger. When a Logger is woken from hibernation state. |
| Start-up signal | 10 alternate flashes of green/red LED’s | Displayed when the Logger starts its recording cycle. The delay time is re-started (followed by delay signal). |
| Logging active, no alert present | Single flash of green LED every 4 seconds | Indicates the Logger is recording. This is not displayed when pre-start is active and the main logging cycle has not yet started. It is also not displayed when the green LED has been turned off in the configuration screen. |
| Logging finished, no alert present | Single flash of green LED every 8 seconds | Indicates Logger has finished recording. This is not displayed when the green LED has been turned off in the configuration screen. Will also be displayed when unit has been woken up from hibernation. |
| Logging finished, alert condition present | Single flash of red LED every 8 seconds | Indicates the Logger has finished recording and an alert condition was present during the trip. |
| Logging active, alert condition present | Single flash of red LED every 4 seconds | Displayed when the Logger has been detected an alert condition and the Alert LED has been activated. If an alert is present you cannot determine if the unit is still logging or has finished its log cycle. If the Alert LED has not been activated during configuration, in essence the visual indicators have been disabled, and the green LED will flash every 4 or 8 seconds as above. |
| Stopping (only applies to USB Loggers) | Sequence of very quick simultaneous flashes of green/red LED’s for 2 seconds | When this LED sequence starts, the STOP button must be released for the recorder to stop. With the exception of the USRIC-4. This Logger can’t be stopped manually, however it’s possible to use the hibernation mode to stop the recording. |
| Hibernation | LED’s are not active | Hibernation reduces the current consumption on Loggers to very low levels. |
SIMULTANEOUS LED BLINKING ON THE HAXO-8
Simultaneous LED’s blinking – this can happen when taking a HAXO out of the plastic wrapper – if there is enough static electricity, the unit will wake up and the LED’s will flash. If it is not configured soon after, it returns to hibernation mode. These is no significant effect on battery life when this happens as the unit goes back into hibernation.
STRANGE LIGHT PATTERNS
If your Logger shows strange light patterns, e.g. the LED light does not always come back on. It's highly likely that the battery is getting to the end of it's life and has caused a corruption within the Logger. The impact of often downloading the data is quite significant on battery life and can be reduced by turning off (hibernating) the Logger between uses.
You can check the average battery life of your Logger on our products page, by selecting your model number. On average this is between 2-3 years.
If your Logger is relatively new and you still have the same problem, please send us your diagnostics.
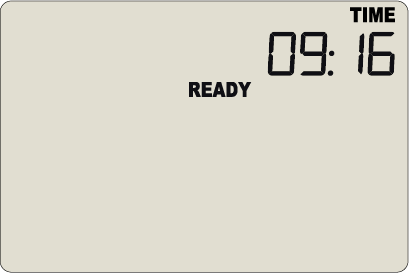
You can reset a TRED30-16R, if necessary and enabled, to bring it back to it's original "READY" state. Once re-set, recording can be started again.
For this process to work, the recorder must be in "STOPPED" state. Be aware that all recordings need to be saved before resetting the Logger. By resetting the Logger, all files will be deleted and cannot be restored.

The ability to reset a recorder is enabled or disabled in the advanced options, when configuring the TRED30-16R Logger via LogTag Analyzer.
LogTag Analyzer sets the Loggers internal real time clock to the configuration PC’s time, however the user can manually change the display clock on the TRED30-16R Logger, if required.
Press and hold the ‘start button’ and ‘review button’ together continuously for 8 seconds. During this period the display will flash ‘CLOCK ADJ’.
Release the buttons when the flashing stops to enter ‘clock adjust’ mode. The minutes will flash. Press the ‘start button’ to put in the minutes and press the ‘review button’ to accept the minute changes and to start editing the hours.
The hours will now flash. Press the ‘review button’ to increment the hours and press the ‘start button’ to accept and store the new time. If recording is active, a clock change event will be recorded with the next logged reading, which will be displayed in the downloaded data.
NOTE: If the time/date on your report is different to the time/date on your screen this could be due to loss of power.
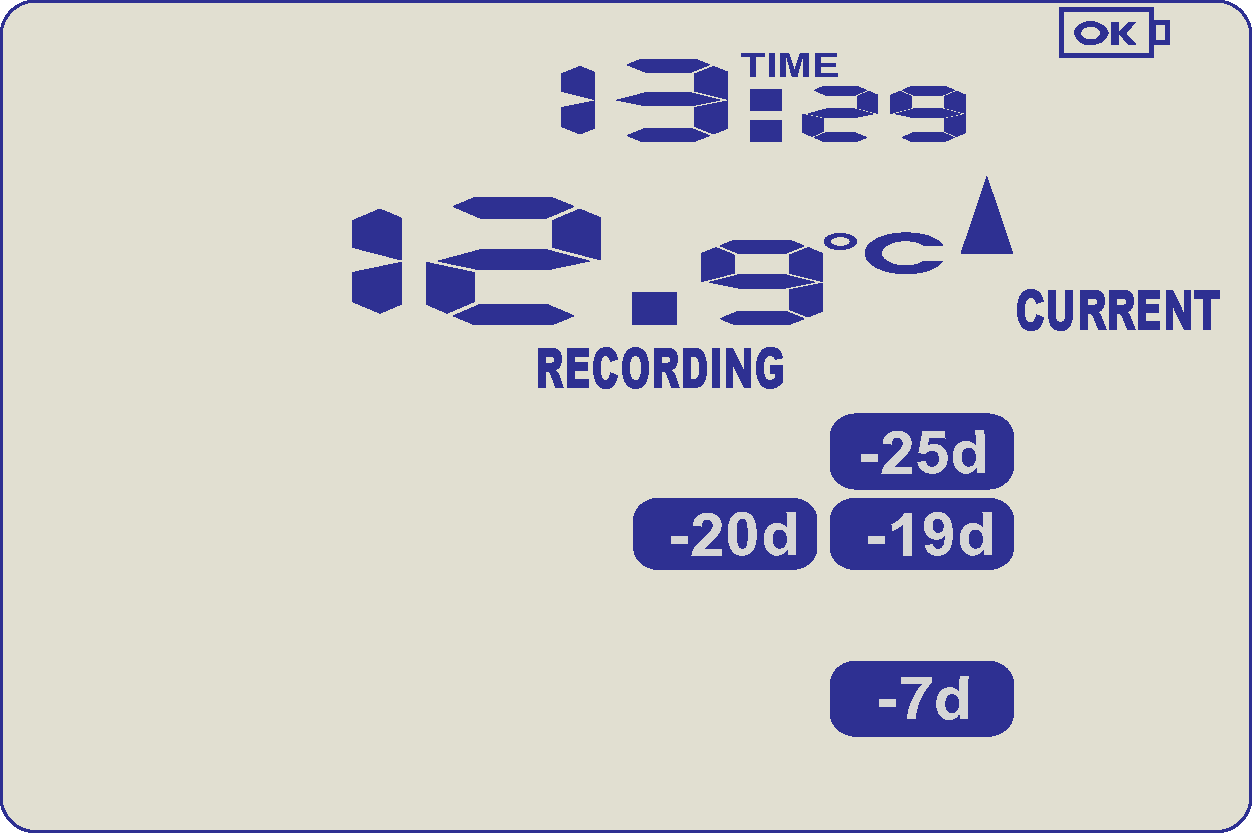
During recording, the display of the TRED30-16R / TRID30-7 shows the temperature of the last reading taken, the current time, battery status, a combination of alarm status and history. A reading is taken and the display updated every logging interval, as configured in LogTag Analyzer.
TRED30-16R
Following are some examples:
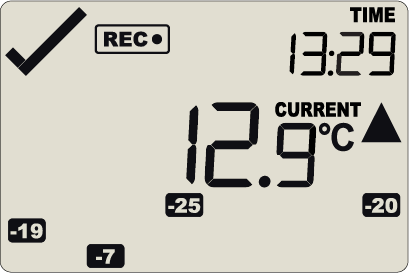
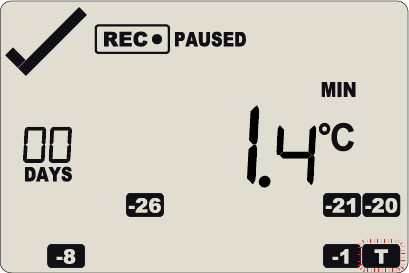
In this example the display shows that alarm events occurred 7, 19, 20 and 25 days ago. The current temperature is over the upper limit (indicated by the arrow pointing up) but has not been over for long enough to trigger an alarm.
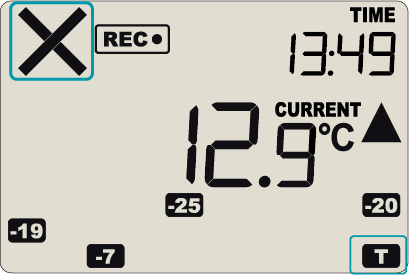
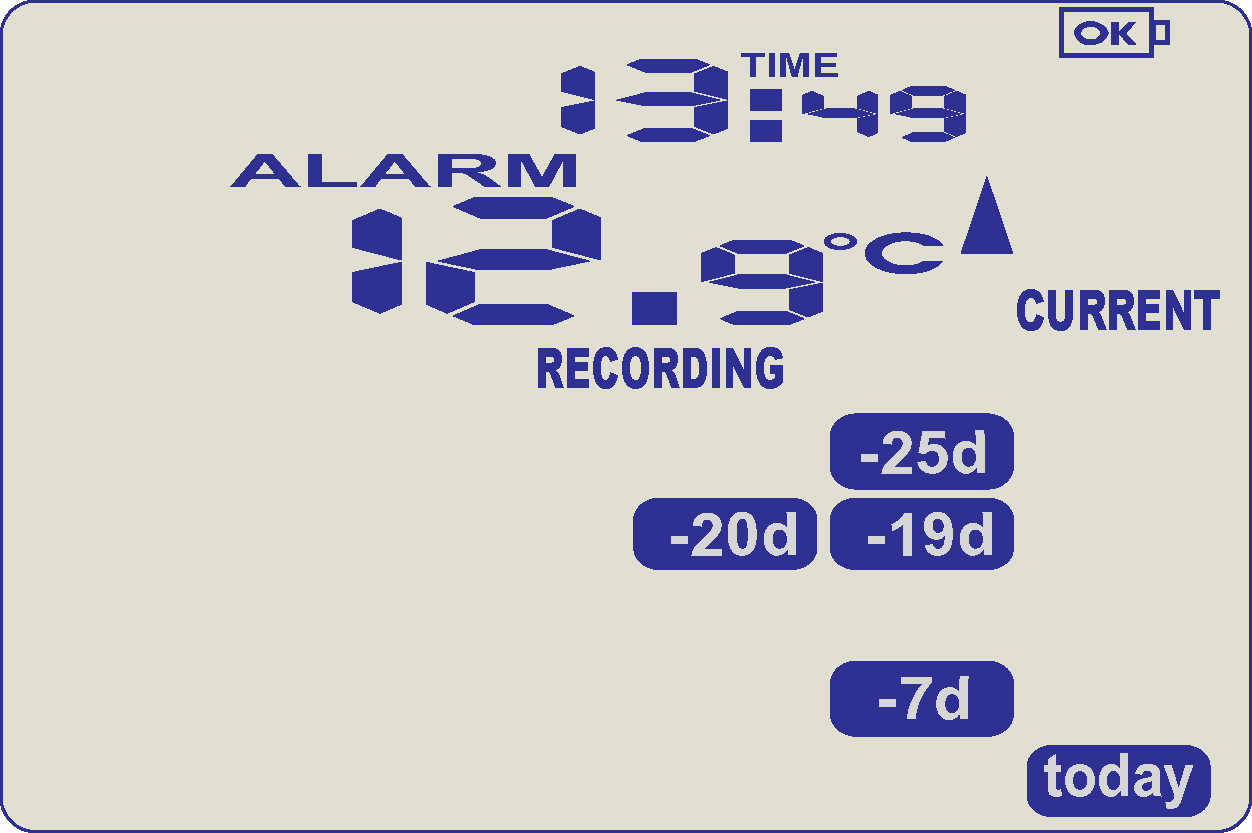
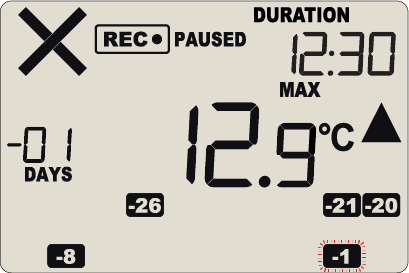
20 minutes later the over temperature has triggered an alarm. The ‘X’ symbol and the ‘T’ marker day alarm are shown.
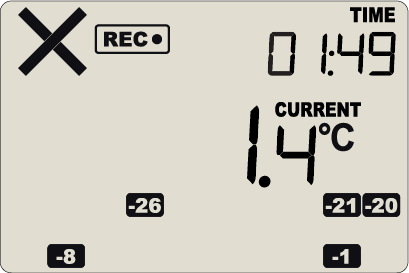
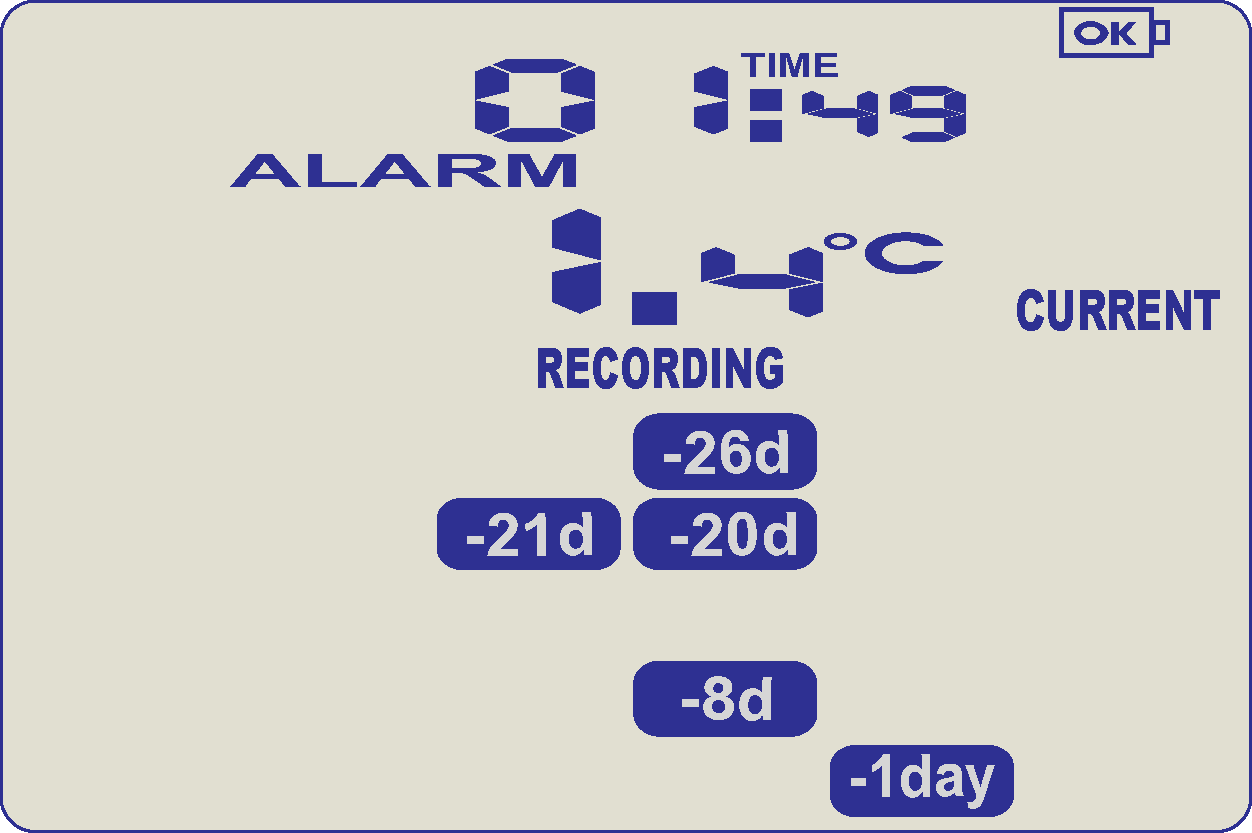
The next day, the temperature has returned to the acceptable range but the alarm remains present. The day summary has shifted by 1 day as the time has gone through midnight.
TRID30-7
Following are some examples:
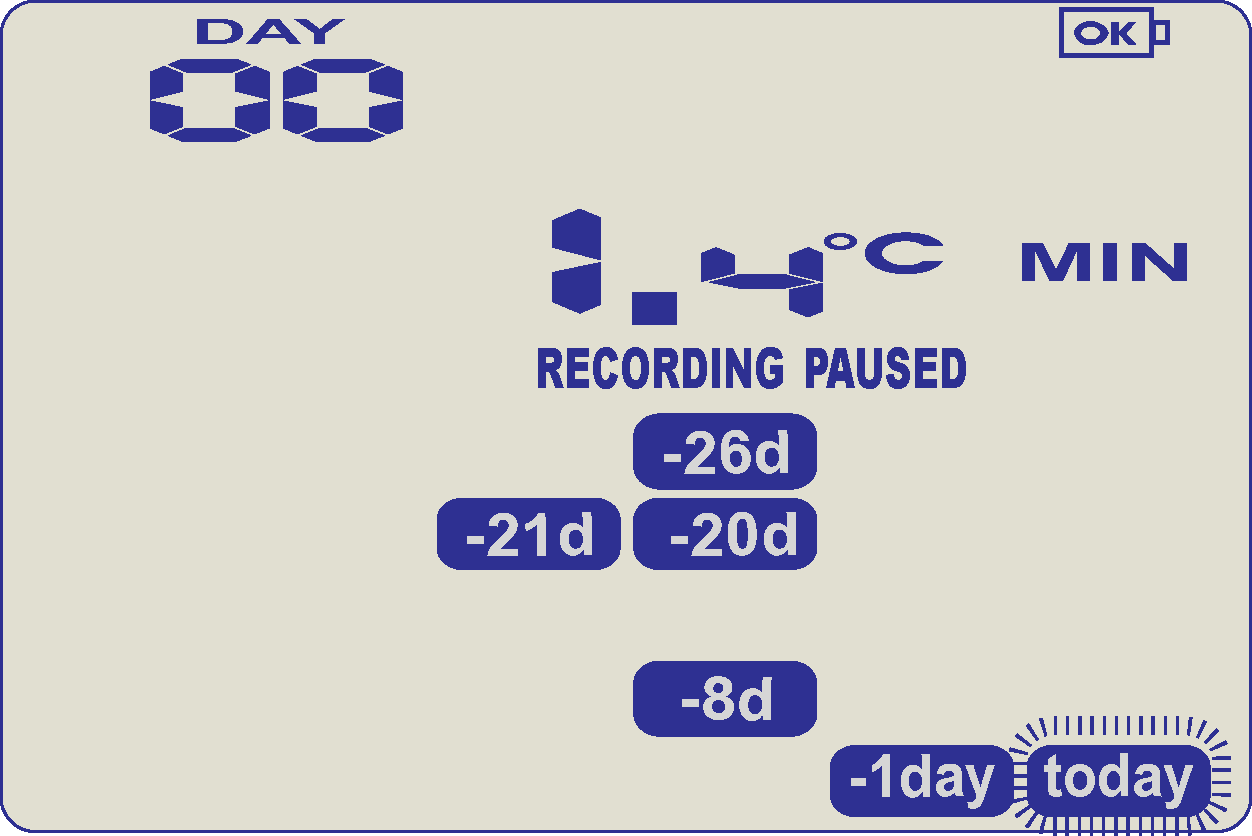
In this example the display shows that alarm events occurred 7, 19, 20 and 25 days ago. These alarms were cleared by an inspector as the display currently shows no “ALARM” symbol. The current temperature is over the upper limit (indicated by the arrow pointing up) but has not been over for long enough to trigger an alarm.
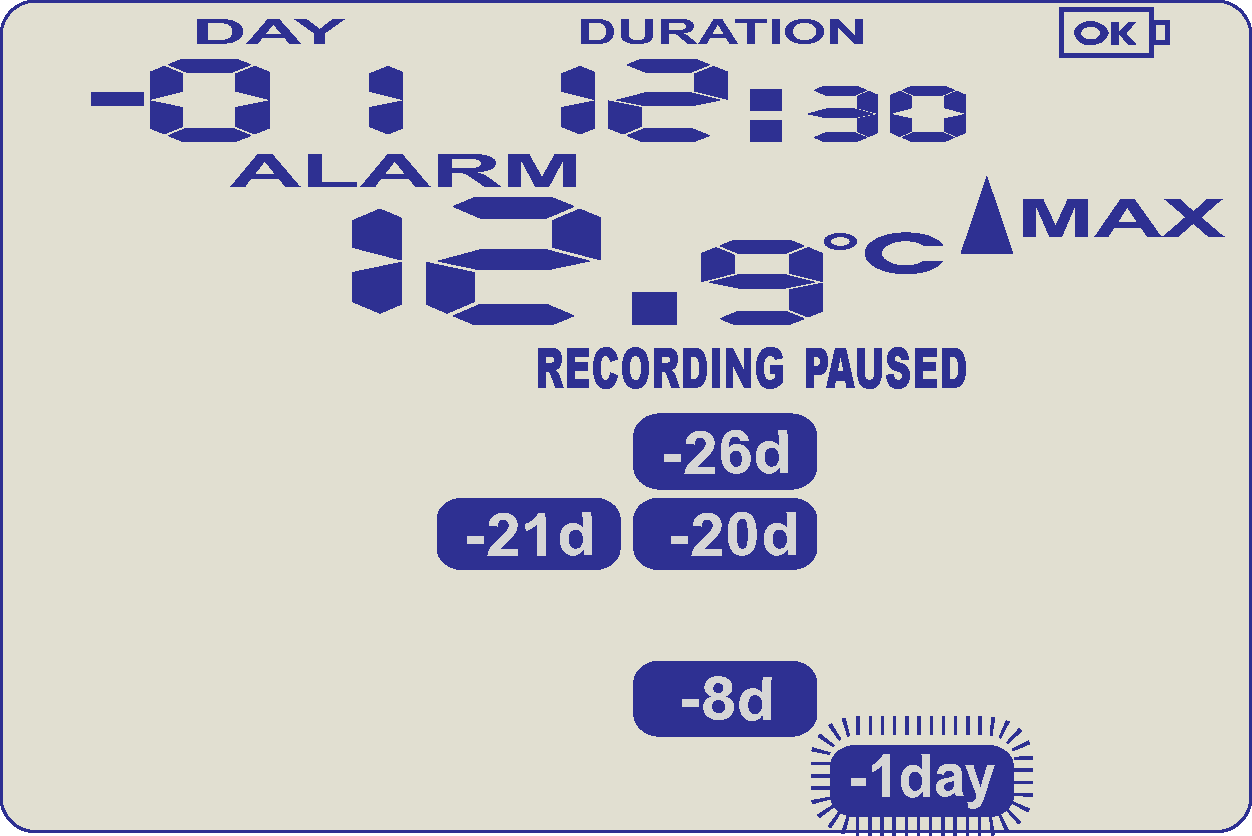
20 minutes later the over temperature has triggered an alarm. The ‘ALARM’ symbol and the ‘TODAY’ marker day alarm are shown.
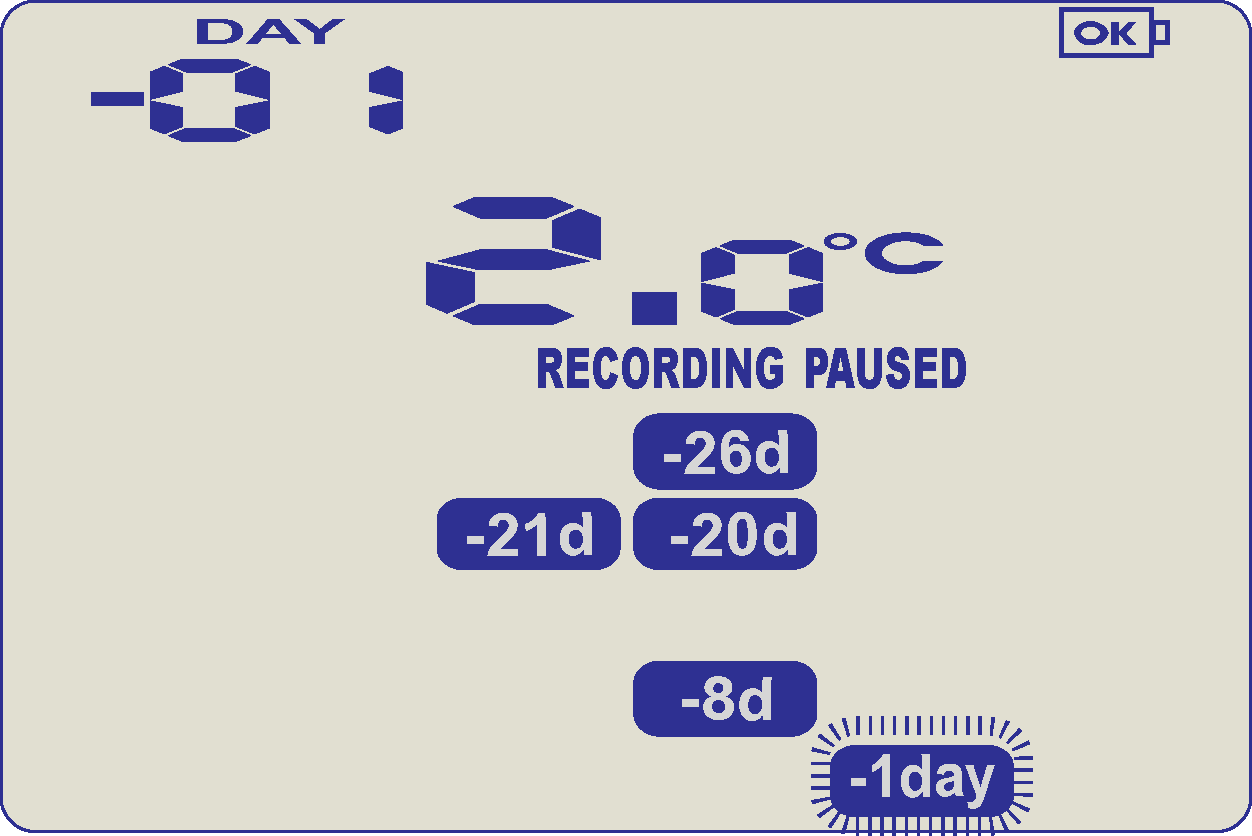
The next day, the temperature has returned to the acceptable range but the alarm remains present. The day summary has shifted by 1 day as the time has gone through midnight.
When your Logger is showing 'not rdy' (not ready) or 'slp' (sleep) on the display, your Logger has been hibernated to preserve its battery before the logger is used.
To remove the logger from hibernate state it must be configured with LogTag Analyzer software.
On the TRID/TRED model loggers, you can press and hold the 2 buttons for 6 seconds. During this time the text “READY” flashes. Release the buttons when the flashing stops. This will re-activate the Logger and get it out of the hibernation state.
You can re-activate a Logger with a low battery, however it is not recommended to commence another trip.
Note: The real-time clock is not running in a hibernated recorder and must be set up if the recorder is manually activated.
When we generally see cases like “136000=9´6” or “óÿ~ðùó” this has generally been caused by either water ingress or exposure to a strong EM field which has damaged random areas of the LogTag's memory and would require a full analysis by someone technical in order to determine whether it could be recovered or not.
When your LogTag Recorder displays any of these codes, please contact your supplier about this.
en/faq/technical-details/logtag-recorder-displays-y-y-y-y-y-or-136000-9-6-or-o-y/
TRED30-16R
The Logger will display up to 30 days of max/min/duration and alarm statistics. If the Logger is configured to record longer than 30 days (or continuously) then the day statistics will contain up to the latest 30 days.
To review the day statistics, press the ‘review button’. Each press of the button will step through the Max and Min temperatures for each day starting with today and moving backwards through the days (displayed day will flash). Any button activity during recording will place an inspection mark in the next reading of logged data which will be displayed when the data is downloaded.
Following are some examples:
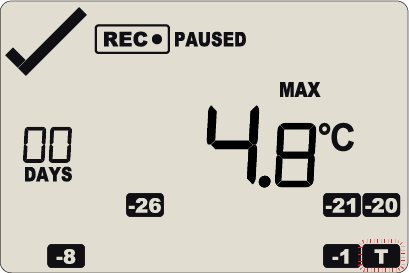
Pressing the 'review button' displays current days ‘MAX’ statistic. The ‘TODAY’ segment flashes and ‘DAY 00’ is shown to indicate the ‘Today’ selection.The selected day (today) does not have any recordings outside the preset limits.
Pressing the ‘review button’ again displays the days ‘MIN’ statistic. The ‘MIN’ statistic is not below the limit and did not trigger an alarm.
Pressing the ‘review button’ again displays the next previous days ‘MAX’ statistic. There are recordings that are above the upper limit. The ‘MAX’ statistic is above the upper limit (indicated by the arrow pointing up) and the ‘ALARM’ was triggered for a duration of 12 hours and 30 minutes.

Pressing the ‘review button’ again displays the days 'MIN’ statistic. The ‘MIN’ statistic is not below the limit and did not trigger an alarm.
TRID30-7
The Logger will display up to 30 days of max/min/duration and alarm statistics. If the Logger is configured to record longer than 30 days (or continuously) then the day statistics will contain up to the latest 30 days.
To review the day statistics, press the ‘review button’. Each press of the button will step through the Max and Min temperatures for each day starting with today and moving backwards through the days (displayed day will flash). Any button activity during recording will place an inspection mark in the next reading of logged data which will be displayed when the data is downloaded.
Following are some examples:

Pressing the ‘review button’ displays current days ‘MAX’ statistic. The ‘TODAY’ segment flashes and ‘DAY 00’ is shown to indicate the ‘Today’ selection. The selected day (today) does not have any recordings outside the preset limits.
Pressing the ‘review button’ again displays the days ‘MIN’ statistic. The ‘MIN’ statistic is not below the limit and did not trigger an alarm.
Pressing the ‘review button’ again displays the next previous days ‘MAX’ statistic. The ‘MAX’ in this example is above the upper limit (indicated by the arrow pointing up) and the ‘ALARM’ was triggered for a duration of 12 hours and 30 minutes.
Pressing the ‘review button’ again displays the days ‘MIN’ statistic. The ‘MIN’ statistic is not below the limit and did not trigger an alarm.
If less than 30 days of recordings have been collected, the day marker only advances as far as there is data available. After the last day for which statistics have been collected is displayed, the next press of the ‘start button’ rolls the summary back to the statistic for ‘TODAY’.
When an alarm event has occurred, the ‘X’ symbol is displayed.
To clear the 'X' symbol from the display, press and hold the ‘START/CLEAR/STOP’ button until the ‘X’ symbol stops flashing and the audible alarm stops, then immediately release. Alarm events continue to be displayed in the history area of the display and can be reviewed with the day statistics.
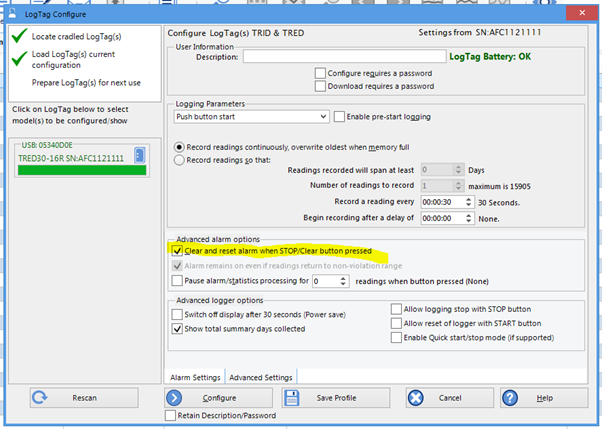
If your audible alarm is not clearing, go to the configuration settings in LogTag Analyzer and go to Advanced Settings. You can select 'Clear and reset alarm' when 'START/CLEAR/STOP’ button pressed.
Depending on whether Enable Quick start/stop mode (if supported) - pressing and holding 'START/CLEAR/STOP’ button for 2 seconds (if Quick start/stop is enabled) or 6 seconds (if Quick start/stop is not enabled) will clear the alarm. At the next recording, there will be no alarm unless the temperature is still outside the set alarm levels.
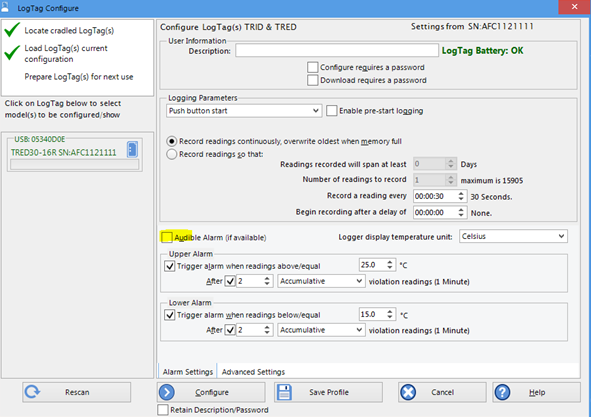
The TRED30-16R Logger has an audible alarm. The alarm is configured on the main configuration screen when configuring the recorder.
Please note, that continual activation of the audible alarm will reduce the working life of the battery. When an alarm event is triggered, the alarm should be cleared as soon as possible.
The beeper will temporarily turn off when you are reviewing data.
Having trouble clearing your audible alarm? Have a look here.
During configuration you are able to set up your upper and lower alarms.
If you have a TRED30-16R Logger (you can check on the back of your Logger, your model number) you have access to the daily maximum and minimum readings taken.
If enabled, the Logger can be re-activated after hibernation, for re-use by either re-configuring using LogTag Analyzer or by using the following procedure; press the ‘START/CLEAR/STOP’ button. The ‘READY’ text will start flashing on the display. Release the button when the flashing stops.
The Logger will then be ready for a push button start. Data/time start is only possible by
re-configuring with LogTag Analyzer. Be aware that re-activating the Logger will erase all previously recorded readings and statistics!
The option to re-activate the Logger can be disabled during configuration, see advanced options in LogTag Analyzer.
Loggers can be hibernated between uses to prolong battery life.
WHAT IS THE HIBERNATE FEATURE?
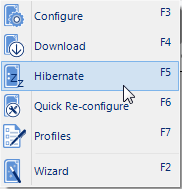
Loggers can be hibernated via LogTag Analyzer by selecting Hibernate from the LogTag menu.
When hibernated, all logging functions are suspended, all indicators are turned off and internal components are switched to low power. This reduces the current consumption on Loggers to very low levels. If units are hibernated between uses, for example when the unit is not required for another trip straight away, the battery life can be significantly extended.
Loggers are automatically ‘woken up’ from hibernation if they are placed in an interface and accessed, and do not automatically return to the hibernate state. The green LED will blink every 8 seconds to indicate its ‘awake’ status, any previously recorded data, however, will no longer be accessible.
Note that loggers may wake up from hibernate if static discharges into the contacts of the logger as a result of handling the logger after it has been hibernated.
PUT THE LOGGER IN HIBERNATION MODE
To set a Logger to "Hibernation", in LogTag Analyzer, select Hibernate... from the LogTag menu or pres 'F5'.
Once a Logger has been successfully set to "Hibernation" it should be removed from the Interface Cradle before pressing any other button. As soon as the software communicates with a Logger in "Hibernation", (for example through automatic download it will be returned to normal operation).
The extent to which the Hibernation will prolong the battery life of a Logger may vary between different models and versions of Loggers.
en/faq/technical-details/turning-off-hibernating-the-logger/
The most common industry standard expression for temperature reading stabilization time is the ‘T90’. This is defined as the typical time taken of a given sensor in a given environment (e.g. moving air, still air, liquid etc.) to register 90% of an immediate step change in temperature.
The T90 of TRIX-8 is typically less than 5 minutes in moving air of 1m/s.
As the thermal step response is basically dependent on the latent heat of the two thermal masses involved (the Logger and the surrounding environment) and the rate of thermal transfer between them, the T90 is the same irrespective of the difference of temperatures though at extremes (water freezing and boiling points for example) the environment does not behave homogeneously thereby changing the rates of thermal conduction and therefore changing the resulting T90 value.
For example: in a situation of a 25°C step change say starting at 10°C and moving to 35°C in moving air of 1m/s, the TRIX-8 will typically register 90% of the step after less than 5 minutes – i.e. 0.9×25 = 22.5 -> 10+22.5 = registering 32.5°C within 5mins.
The T90 for a 15°C step in 1 m/s moving air (say 10°C to 25°C) will be the same. 0.9×15 = 13.5°C +10 = registering 23.5°C within 5mins.
T90 is different in slower moving air or still air, though air is never totally ‘still’ when a temperature difference exists as convection will take place.
en/faq/technical-details/how-fast-will-a-trix-8-react-to-change-in-temperature/
A LogTag data logger will record the temperature (and humidity of applicable) directly adjacent to its sensor. The logger has no "radius" or "area of coverage", and we cannot advise how many loggers will be required to cover a certain area.
How representative the measurements are for an area (or air volume) depends greatly on several environmental factors, including, but not limited to, air movement and obstructions in the area a logger is deployed. There is no set rule that can cover this.
If this is critical to your operation, we recommend to get a laboratory to undertake a mapping study, where multiple loggers are put in the area to be monitored.
The number of loggers and the ideal positions for them to be located can be determined on the basis of any variation noted in the mapping study, and how critical temperature or humidity are for the product being monitored. It will also tell you how representative the placement of your logger is for other locations in the area.
If you own multiple loggers, you can undertake a mapping study yourself, however, we recommend to leave this to an expert.
en/faq/technical-details/determining-the-number-of-loggers-for-an-area/